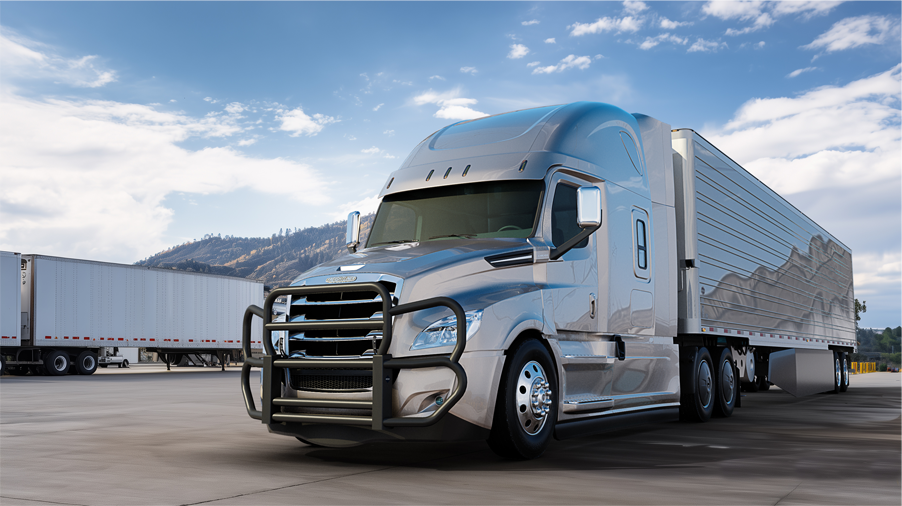
The Freightliner Cascadia is one of the most commonly operated commercial trucks on North American highways. It’s also one of the more involved platforms when it comes to adding front-end protection. The Cascadia’s modern cab design, sensor-integrated front end, and model year variations mean that a Freightliner Cascadia grille guard installation isn’t a simple bolt-on job – it requires preparation, the right fitment confirmation, and a methodical approach to post-install verification.
This guide walks through what mechanics and owner-operators should expect when adding a HERD Gen 4 grille guard to a Cascadia. It’s a practical overview of the process: what needs to happen before the guard goes on, what the installation involves at a high level, and what has to be confirmed before the truck goes back into service.
With over two decades focused exclusively on commercial truck front-end protection, HERD developed the Gen 4 grille guard lineup around model-specific fitment – built for platforms like the Cascadia, not adapted from a generic design.
Why the Freightliner Cascadia Requires Careful Preparation
Not every truck presents the same installation considerations. The Cascadia has a few specific characteristics that make upfront preparation more important than on older or simpler platforms.
Sensor Integration in the Front End
Newer Cascadia configurations come equipped with radar-based collision avoidance systems. These sensors are sensitive to obstruction, and a grille guard that isn’t designed with CAS compatibility in mind can block or interfere with the sensor field – creating a real safety concern that needs to be addressed before the truck returns to service.
HERD Gen 4 grille guards are developed with CAS compatibility worked into the guard structure and bracket positioning from the design stage. The guard is not retrofitted around sensor requirements after the fact – sensor placement is a consideration that shapes how the mounting system is built. Even so, CAS compatibility at the design level is not the same as confirmed sensor function on a specific truck. Post-installation verification is still a required step.
Model Year Variation
The Cascadia has gone through significant design revisions across its production run, most notably the transition from the Classic Cascadia to the New Cascadia. Front-end geometry, tow receiver placement, and sensor configurations differ between generations. A guard specified for a New Cascadia will not necessarily fit a Classic Cascadia correctly.
This is why the conversation with a HERD dealer starts with the exact Cascadia generation and model year, not just the truck name. Getting that detail right up front is what makes the rest of the installation go cleanly.
Tow Receiver Condition
HERD mounting brackets integrate directly with the truck’s tow receivers. On a well-maintained truck, this is a clean and secure connection. On a truck with receiver corrosion, damage, or previous modifications, the mounting interface may need attention before the guard can be properly seated. Inspecting the tow receiver condition before scheduling the installation avoids delays on the day of the job.
Before the Guard Goes On: The Pre-Installation Checklist
A Freightliner Cascadia grille guard installation done right starts well before the guard is near the truck. Here’s what should be confirmed in advance:
- Fitment verification: Confirm the specific Cascadia model year and configuration with an authorized HERD dealer. Wrong fitment means the guard won’t seat correctly, and the job stops.
- Guard specification review: Confirm which guard is being installed – the Grille Guard 200 or Grille Guard 300 – and the finish option. Once installed, finish corrections require a full swap.
- CAS inventory: Identify all active front-end systems on the truck: radar sensors, cameras, and any other forward-mounted technology. This inventory is the basis for post-installation verification.
- Tow receiver inspection: Check both tow receivers for corrosion, deformation, or prior damage. The bracket-to-receiver connection is load-bearing – it needs to be in sound condition before the guard goes on.
- Workspace and access: Confirm that the installation space gives full, unobstructed access to the front of the truck. Attached trailers or tight shop conditions create unnecessary complications.
What the Installation Involves
HERD Gen 4 grille guards use AR450/Hardox-rated heavy gauge steel brackets that mount into the truck’s tow receivers. The guard structure – 3″ round 304 stainless steel tubing with welded gussets at uprights and tube connections – attaches to those brackets across the front of the Cascadia.
The Grip Latch is part of the installed assembly. Getting it properly aligned during installation matters because it’s what mechanics use every time front-end work is done on the truck.
At a high level, the installation sequence involves:
- Confirming tow receiver alignment and condition before bracket placement
- Positioning and securing the mounting brackets into the tow receivers
- Attaching and aligning the guard structure to the mounted brackets
- Verifying the Grip Latch opens, closes, and engages cleanly
- Checking guard clearance against the Cascadia’s fascia, headlight housings, and sensor zones
- Running post-installation system verification before the truck returns to service
On a Cascadia – with its sensor integration and generation-specific front-end geometry – each step deserves full attention. Rushing any part of it is where callbacks start.
Post-Installation Verification: The Step That Can’t Be Skipped
On a Cascadia equipped with collision avoidance systems, post-installation verification is not optional. The guard may be CAS-compatible by design, but the only way to confirm that the specific truck’s sensors are functioning correctly after the install is to test them.
Post-installation verification on a Cascadia should cover:
Radar Sensor Function
The radar-based collision avoidance system needs to be tested after the guard is in place. Sensor placement can vary between Cascadia model years and individual truck configurations. Testing confirms the guard hasn’t introduced any obstruction or interference in the sensor field.
Lighting and Visibility Check
Confirm that all front-facing lighting – headlights, turn signals, and marker lights – is fully visible and unobstructed with the guard installed. The guard profile should clear all light housings without blocking output.
Grip Latch Operation
Test the Grip Latch through a full open-and-close cycle. Confirm it opens cleanly, swings to full clearance, and re-engages with the security lock functioning correctly. A Grip Latch that binds or doesn’t fully engage needs adjustment before the truck leaves the shop.
Hardware Torque and Seating Check
With the guard fully installed, confirm that all mounting hardware is properly torqued and seated. Check the bracket-to-receiver interface for any movement or play before the truck goes back into service.
Road Test
A short road test after installation is worthwhile, where possible. It surfaces any vibration-related issues with the guard or hardware before the truck goes back into service.
Working With an Authorized HERD Dealer
Freightliner Cascadia grille guard installation is best handled by someone familiar with the platform and the product. HERD-authorized dealers know the model-specific fitment requirements of the Gen 4 lineup and what post-installation verification looks like on a Cascadia with active CAS.
For owner-operators directing their own shop mechanic, the HERD dealer network is the right starting point for fitment confirmation and technical questions before the job begins.
The guard carries a 3-year structural warranty and a 5-year warranty on the Grip Latch mechanism. A clean installation from the start is how that coverage stays intact.
Get the Right Guard for Your Cascadia
Fitment starts with the right conversation. Contact HERD to reach an authorized dealer who can confirm the correct guard specification for your Cascadia’s model year and configuration, and answer any pre-installation questions before the job gets scheduled.
For a full look at the Gen 4 grille guard lineup, including the Grille Guard 200 and Grille Guard 300, visit the HERD grille guard page.
Frequently Asked Questions
Is a Freightliner Cascadia grille guard installation something I can do myself?
The mechanical side – bracket mounting into tow receivers and guard attachment – is within reach for a capable mechanic. The more involved part is post-installation verification, particularly CAS system testing on Cascadias with active radar-based collision avoidance. If that verification isn’t something you can run in-house, working through an authorized HERD dealer makes sure it gets done right.
Does guard installation void any Freightliner warranty coverage?
That question is best directed to your Freightliner dealer rather than answered generally. Aftermarket accessory installation policies vary, and the specifics depend on the components involved and the terms of any active warranty or service agreement on the truck.
Why does model year matter so much for Cascadia fitment?
The Cascadia platform changed significantly between the Classic and New Cascadia generations, with differences in front-end geometry, tow receiver placement, and sensor integration. A guard specified for one generation won’t fit correctly on the other. HERD confirms fitment by make, model, and year specifically because of these generation-level differences – not just to cover formalities.
What finish should I choose for a Cascadia running in northern routes?
All three finishes – polished stainless, satin stainless, and black powder coat – start from the same 304 stainless steel base. For trucks operating in high road salt environments, the stainless-based finishes hold up well with regular cleaning. Black powder coat delivers a clean, low-profile look and is a practical choice where appearance is secondary to function. The decision for the finish comes down to your maintenance routine and the look you want on the truck.
How long does a Cascadia grille guard installation typically take?
Installation time varies by shop, installer familiarity with the platform, and tow receiver condition. That question is best put directly to the dealer or shop handling the job – they’ll give you an accurate estimate based on their setup and experience with Gen 4 guards.